
Data Gap Overrides allow you to streamline packaging assessments by automatically populating missing information, overriding previously answered questions, or defining custom conditional logic across your packaging data.
Whether you need to close an open assessment question or update an existing answer across your portfolio, this step-by-step guide explains how to configure and manage your Data Gap Overrides.
Method 1: Managing Overrides Directly from the Assessment Page
When conducting an assessment on a specific project, you can resolve open questions or override already answered questions on the fly.
Step 1: Navigate to Your Project Assessment
- Go to Projects in the left-hand navigation sidebar.
- Open the desired project and select the Assessment tab.
.svg)
Step 2: Identify the Assessment Question
- Browse the questionnaire to find either an open question (pending data) or an already answered question that you want to update with new logic.
Step 3: Open the Data Gap Overrides Panel
- Click the icon located on the left side next to the question text.
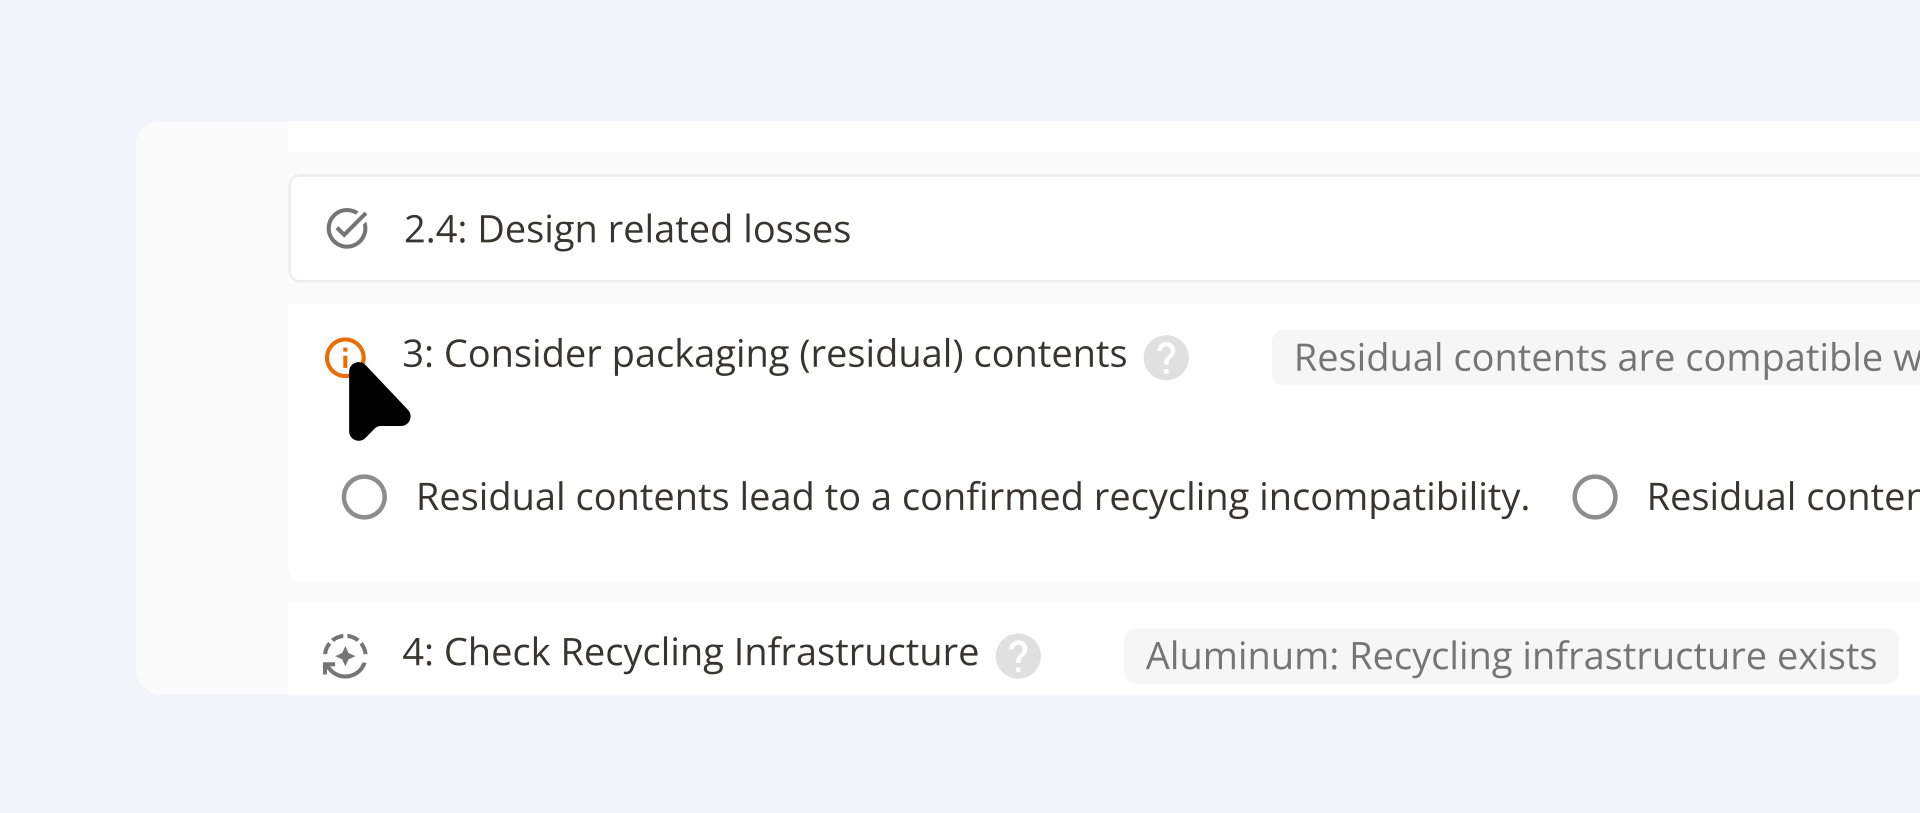
- The Fill Data Gap side panel will open on the right half of your screen.
.svg)
Step 4: Configure the Override
- Select when the rule should apply (Fallback vs. Forced).
- Choose your response mode (Fixed Value or Conditional Rule).
- Select or define the appropriate response value.
.svg)
Step 5: Save the Override
- Click Save & Apply at the bottom of the panel to save your override definition.
.svg)
.svg)
📌 Important Step for Portfolio Impact: To apply your new override rule across your entire packaging portfolio and see the updated results on your Portfolio Dashboards, please notify your Customer Success Manager (CSM) once you have finished setting your rules.
Method 2: Managing Overrides via the Data Gap Overrides Table
To view, edit, or clean up all existing rules in one central location:
- Click Data Gap Overrides in the main left sidebar menu.
- Browse the central table to view all active overrides sorted by rule set, version, override type (Fixed, Conditional, etc.), creation date, and author.
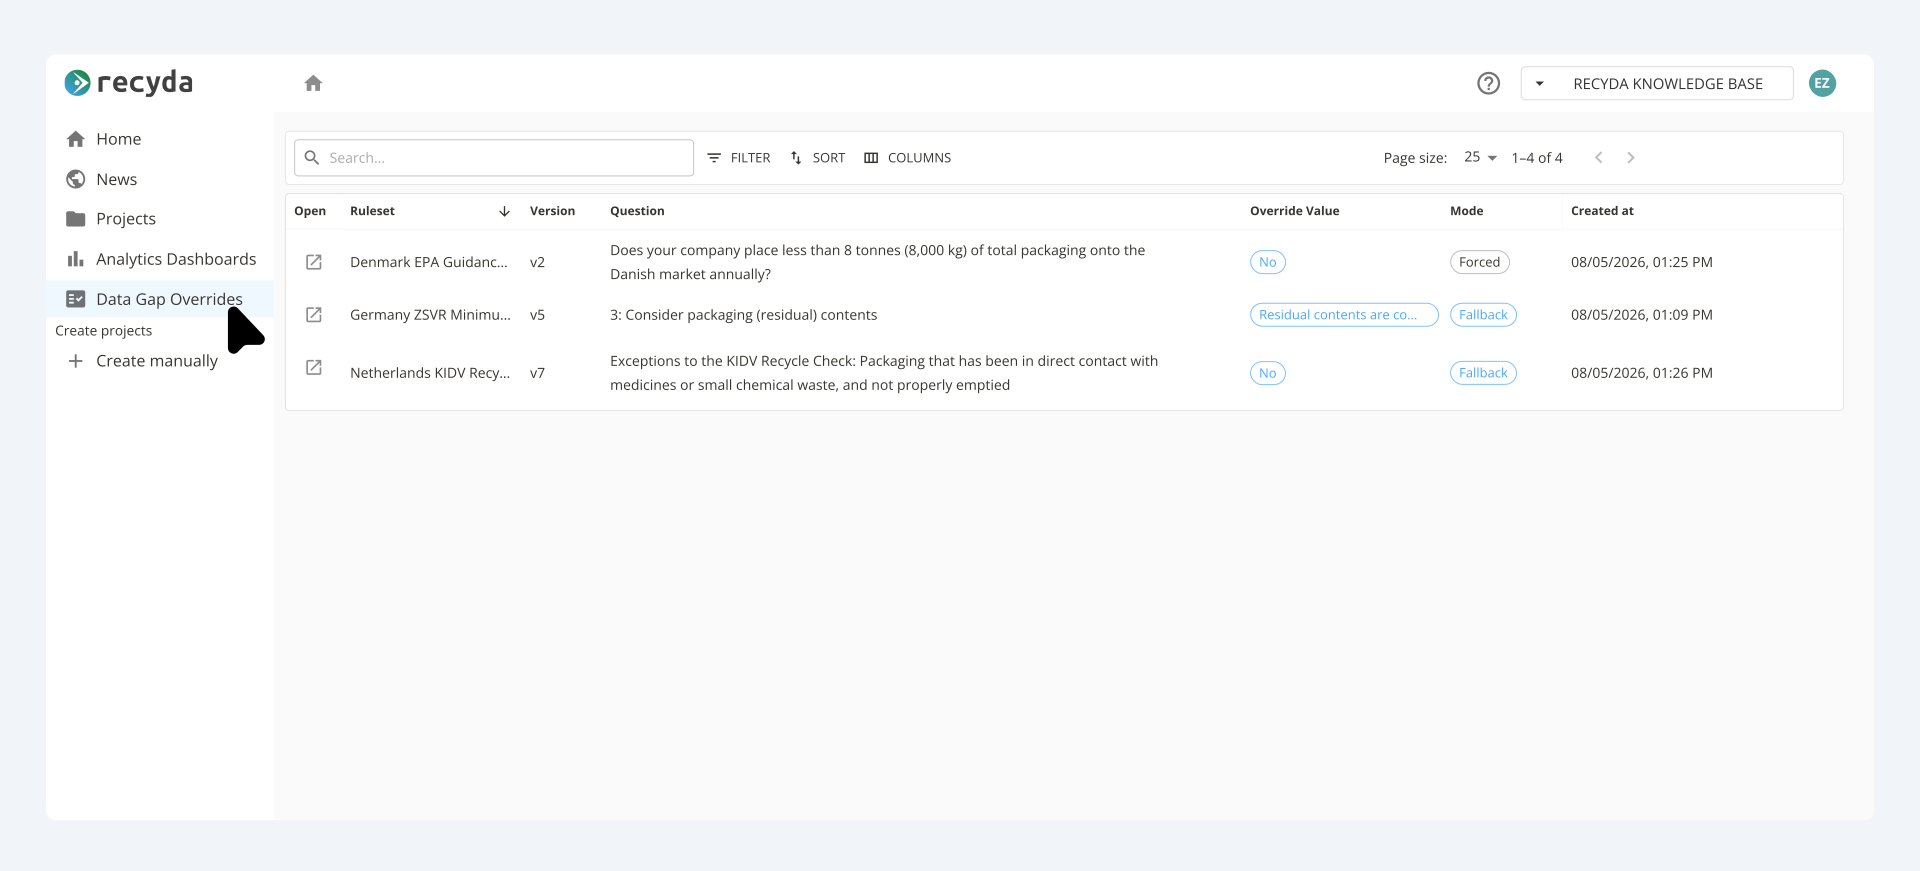
- Click on any row to open its side panel, allowing you to edit or refine the rule settings.
.svg)
.svg)
Method 3: Opening Overrides From Analytics & Metabase Dashboards (if available in your workspace)
When reviewing broader data gap reports or compliance dashboards, you can jump directly to the relevant question to define or update an override.
Step 1: Open Your Reporting Dashboard
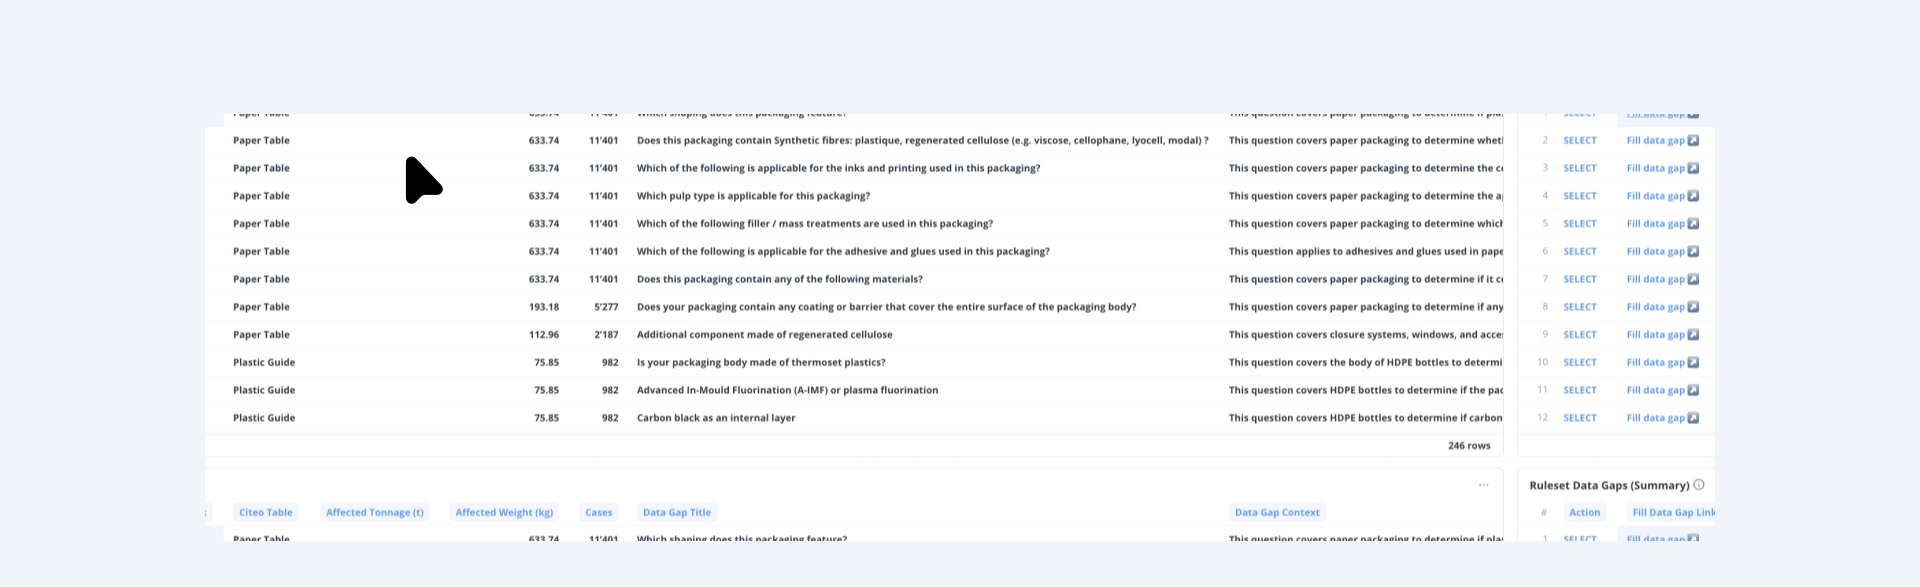
- Navigate to your Analytics Dashboard and select the Ruleset Specific Data Gap.

Step 2: Locate the Data Gap you want to close
- Find the specific data gap question within the report table.
Step 3: Click to Edit
- Click the Fill data gap link provided in the respective data gap.
- The system will take you directly to the central platform table and automatically open the Fill Data Gap side panel for that exact question, allowing you to configure your override immediately.
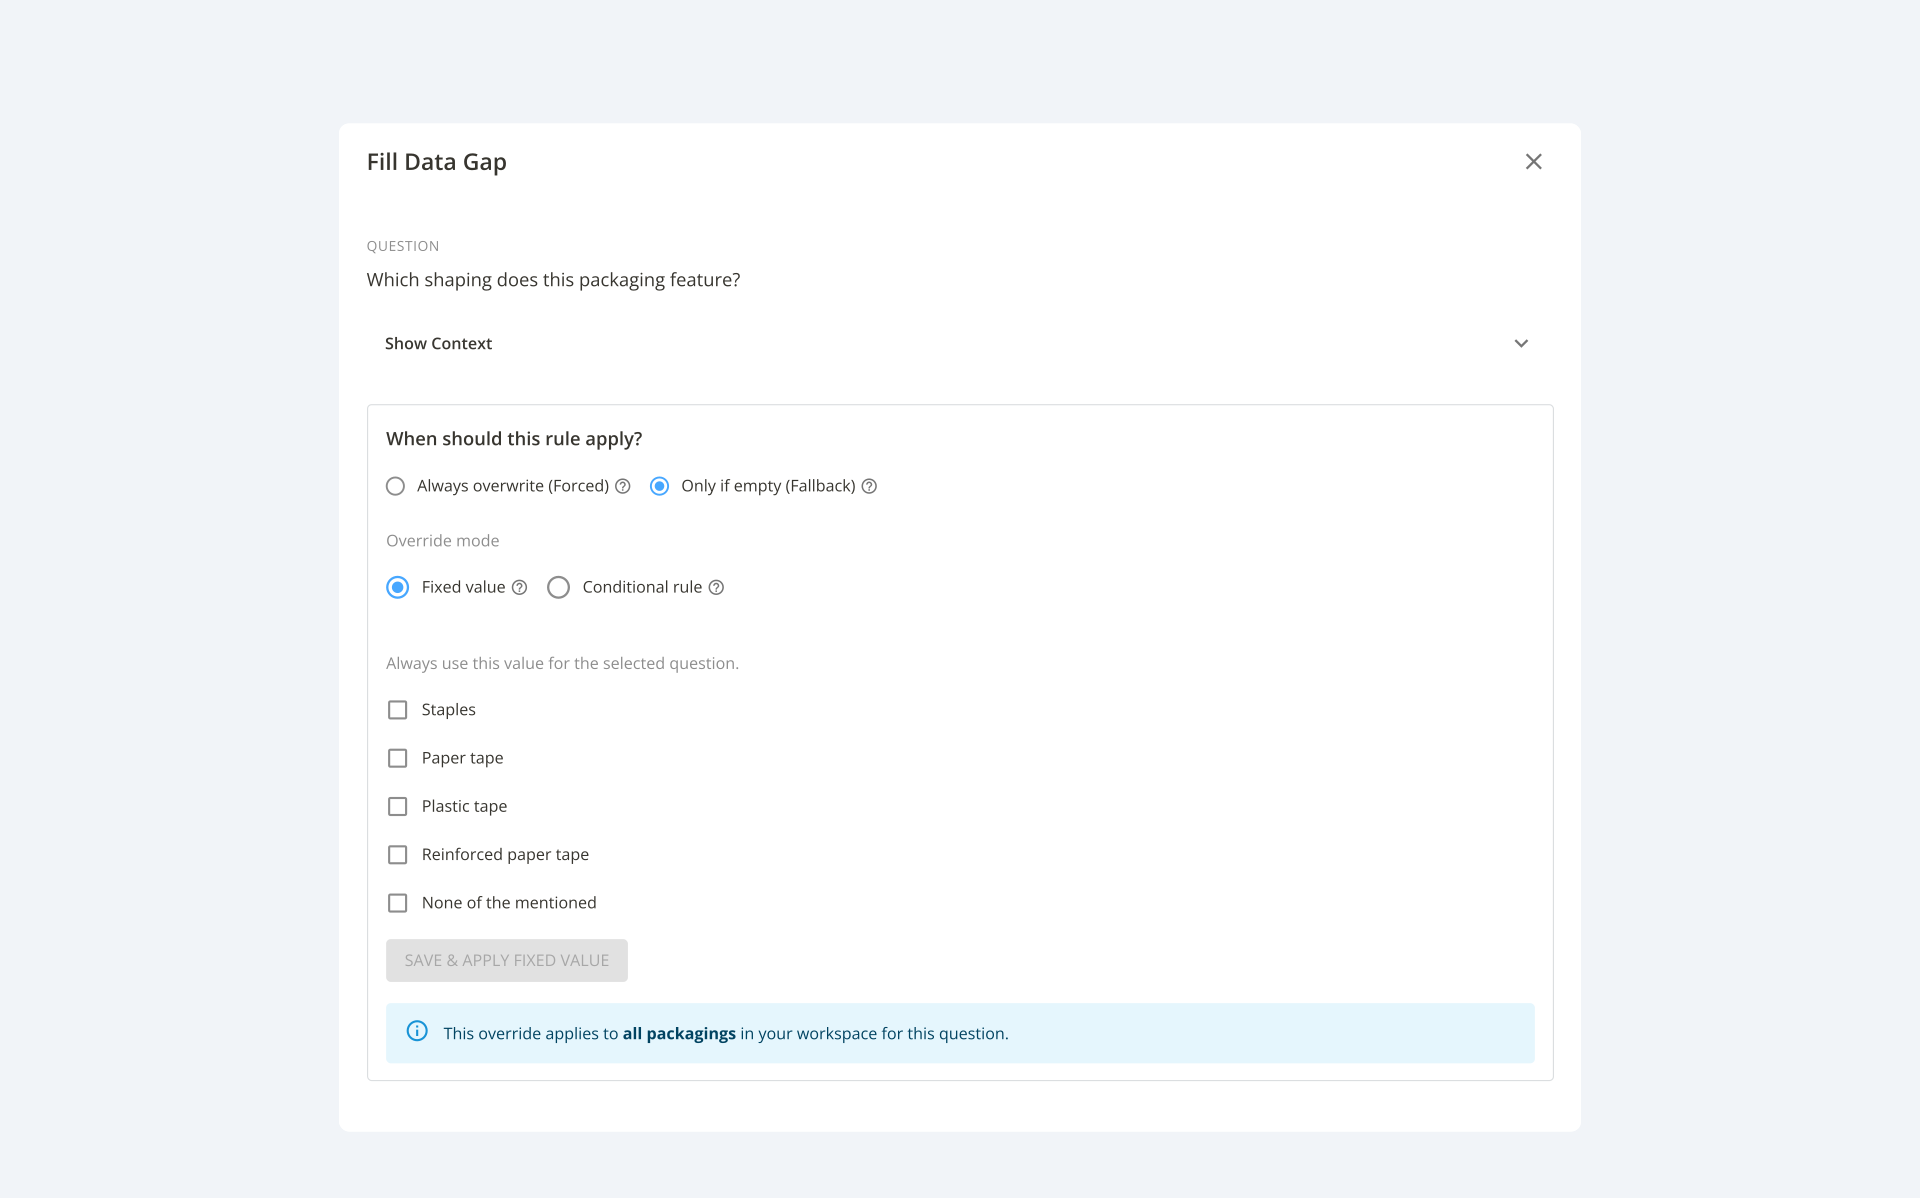
Deep Dive: Configuring the "Fill Data Gap" Panel
When defining an override in the side panel, you have several key configuration options:
1. Show Context
Click Show Context at the top of the panel to view the full breadcrumb path of the question within the regulatory framework (e.g., standard section, assessment step, component category).
2. When Should This Rule Apply?
Choose how the system prioritizes your override:
- Only if empty (Fallback) (Default): Uses the rule set’s pre-populated answer if available; your override triggers only when no data is pre-populated.
- Always override (Force): Forces your specified override value across all matching items, overriding any existing or pre-populated answers.
3. Override Modes
Select how the answer should be determined:
- Fixed Value: Set a simple static answer (e.g., Yes, No, or specific dropdown choices).
- Conditional Rule: Build custom logic using workspace metadata fields:
- Select a Metadata Field (e.g., project attributes, packaging weight, component types).
- Select a Logic Operator (e.g., equals, greater than, contains).
- Input the Target Value and assign the corresponding answer.
- Optionally set a fallback answer under Otherwise (if no rules match).
Important Notice: Reflecting Changes Across Your Portfolio & Dashboards
Configuring a Data Gap Override defines the rule within your workspace. However, to evaluate and apply these overrides across all packaging items in your account:
- Inform Your Customer Success Manager (CSM): Once you have defined or updated your desired overrides, reach out to your CSM.
- Portfolio-Level Application: Your CSM will trigger the bulk evaluation process for your entire packaging portfolio.
- View Dashboard Impacts: Once your CSM completes this step, the updated results and logic will automatically reflect across all your Portfolio-level Dashboards and Analytics reports.